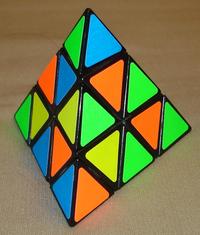
My daughter Emily knows how to solve a Rubik-style pyramid puzzle. I tried learning her method, but I am no good at spotting the patterns that she recognizes effortlessly. Here is a simple recipe suitable for dads.
With a solved puzzle or an online simulator, practice the following three moves.
    . <------ .
     \       ^
 flip \     /
       \   / flip
        V /
         .
Do the move twice more to get back to the original.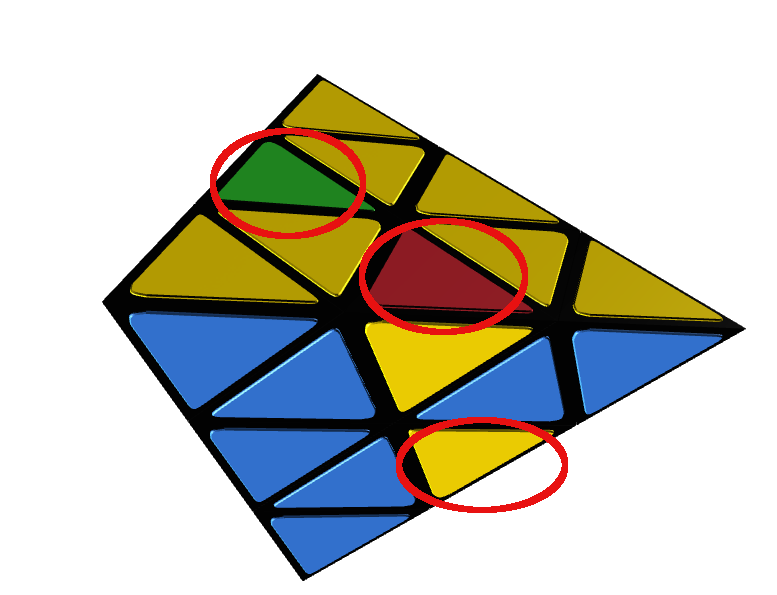
Those are the moves that you need to know to solve the pyramid. Here are the steps:
Gather the three yellow middle pieces (that are neither edges nor vertices) to the front. You can do this ad-hoc, without a recipe. If necessary, twist the vertices so that the yellow edges come to the front. If necessary, rotate the back and the back vertex. Now you only need to solve six edges.
For each of the three middle edges locations, identify the edge that should go there. If it is not on the bottom, use the “bring edge down” move to bring it there. Then rotate the bottom face as needed. As you do that, orient the face wisely so that you get the correct color to the the bottom. If you need to rotate the edge by 120 degrees, you can leave if unflipped (moving it from the top right to the top left) or flip it (anything else). If you need to rotate the edge by 240 degrees, you can leave it unflipped (moving it from the top left and bottom to the bottom right) or flip it (anything else). Once the edge in the right place for the “bring edge up” move, put it into the middle layer.
You should now have all middle edges correctly positioned.
Move the bottom face to the front. If three edges are out of place, you need to rotate them in place. If they need to be rotated clockwise, do the first move once. Now they need to be rotated counterclockwise. Figure out which edges need to be flipped, orient the front face wisely, and do the first move.
If two edges are out of place, swap them as shown above.
Comments powered by Talkyard.