
Step 1. Install GlassFish (at home, before the lab—it's a big download). Go to https://glassfish.dev.java.net/, select Downloads, then Promoted Binary Builds, and pick the latest GlassFish v2 Main branch (Build 17 14-September-06 at the time of this writing). Download the JAR file for your platform and move it to your home directory. If you use Cygwin, remember that ~ is c:\cygwin\home. Then start a command shell and enter these commands. (filename.jar is the name of the file that you downloaded.)
cd ~
java -Xmx256m -jar filename.jar -console
cd glassfish
chmod 755 lib/ant/bin/ant
lib/ant/bin/ant -f setup.xml
Start the application server:
cd glassfish/bin
asadmin start-domain
Point your browser to localhost:8080. You should be getting a screen similar to this:
Step 2. Install NetBeans (at home, before the lab—it's a big download). Go to http://www.netbeans.info/downloads/download.php?a=n&p=1, then select release version 5.5, build type Q-Build, your OS and language. Pick the latest build of the NetBeans IDE (currently build 200609062200 of September 6). Run the installer.
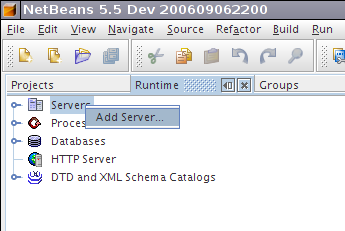
Step 3. Add GlassFish to NetBeans. Start NetBeans. Click on the Runtime tab. Right-click on Servers. Click on Add Server.
Select Sun Java Application Server. For the name, specify GlassFish. Click Next. Click on the Browse button and select the GlassFish server location. Then select the default domain.

Click on Next. Specify username admin and password adminadmin. Click on Finish.
Verify that all went well: Expand the Server node. You should now have a GlassFish node. Right-click on it. Select Restart (or Start if Restart is greyed out). Wait until shutdown and startup is complete. Right-click again and select View Admin Console. You should be getting a browser window such as this one:
 p
p
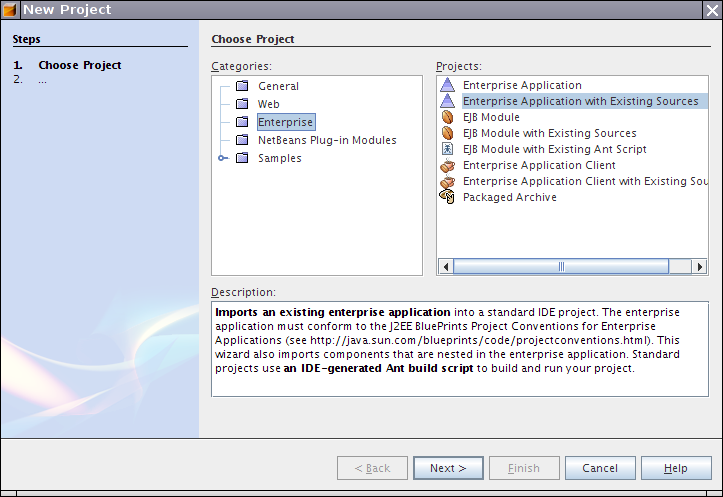
Step 4. Add QuickieQuiz to NetBeans. Unzip this file to a directory of your choice (such as ~). In NetBeans, select File->New Project from the menu. You'll get a wizard that starts like this:
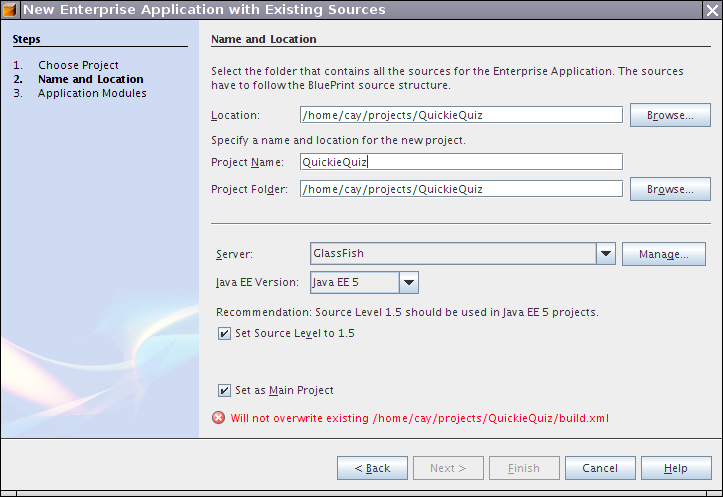
Click Next. You'll get a screen similar to this one. Click Browse to select the root directory of the project (such as ~/QuickieQuiz or c:\cygwin\home\QuickieQuiz). Set the server to GlassFish, the Java EE version to Java EE 5, and the source level to 1.5.
Click Next. You'll get this screen. (Your web module will be called QuickieQuiz.war).
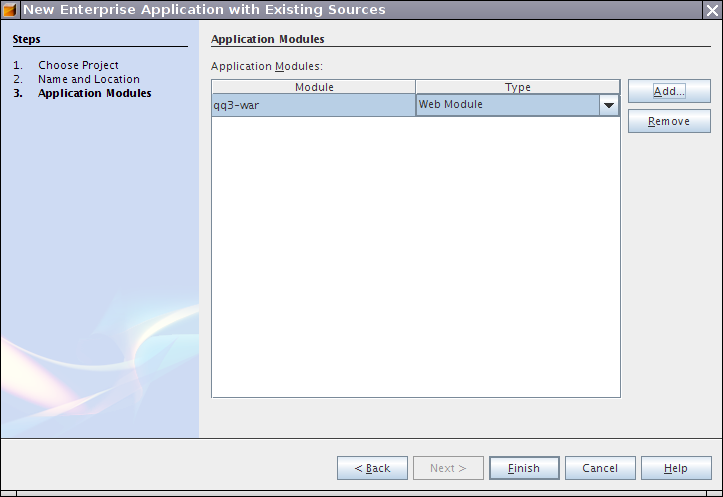
Click on Add. Select the directory QuickieQuiz-ejb. Pull down the Type menu and set the type to EJB module. Click Finish.
Select Run -> Run Main Project from the menu. You should be getting the familiar QuickieQuiz startup screen.
Then again, you may not. There were three NetBeans issues that blocked some people.
...
    <web>
      <web-uri>QuickieQuiz-war.war</web-uri>
      <context-root>/QuickieQuiz-war</context-root>
</web>Step 5. Understand the project architecture. Do this with your buddy. One of you operates NetBeans, the other edits a Track+ Issue in the CS160 project with the title "Lab 5 your name / your buddy's name". Look at the QuickieQuiz code. In the Projects tab, open up the QuickieQuiz project until you find the QuickieQuiz-war and QuickieQuiz-ejb subprojects. Double-click on each of them. They should now be added as top-level projects. Expand both of the projects to understand their structure. Answer these questions:
Step 6. Make a simple change. Also do this with your buddy. Right now, the post-login screen says "Hello, (first name) (last name)!". Change it, so that it says "Welcome, (username)", e.g. "Welcome, saturn6" instead of "Welcome, John Public". Try it out by logging in as username admin, password secret.
Step 7. (Optional—if you have time) Make a more ambitious change. We want the greeting to say "Welcome, (first name) (last name)!" if the there is a first name/last name for the given user name, and "Welcome, (username)!" otherwise.
From an architectural perspective, this is a presentation layer issue. Add a method getSalutation to an appropriate bean.