Using NetBeans 5.5.1 with GlassFish v2
Installation and Configuration
- Download NetBeans 5.5.1 from http://netbeans.org.(Earlier versions of
NetBeans will not work with GlassFish v2.) Run the installer that you
downloaded.
- Dowload the latest GlassFish v2 build from http://glassfish.dev.java.net/.
Install and set up the server as directed. (Don't set up clusters)
- Start NetBeans. Click on the Runtime tab. Right-click on the
Servers node and select Add Server. Select Sun Java
System Application Server. (Don't ask—the marketing geniuses
struck again.) Change the Name entry to GlassFish. Click
Next. Enter the directory into which you installed GlassFish and
select Register Local Domain. The wizard should find the default
domain directory.

- Click Next. The default username/password are admin
and adminadmin. Click Finish. The GlassFish server
should now appear in the list of servers:

Running a Core JSF Program in NetBeans
- Select File -> New Project from the menu.
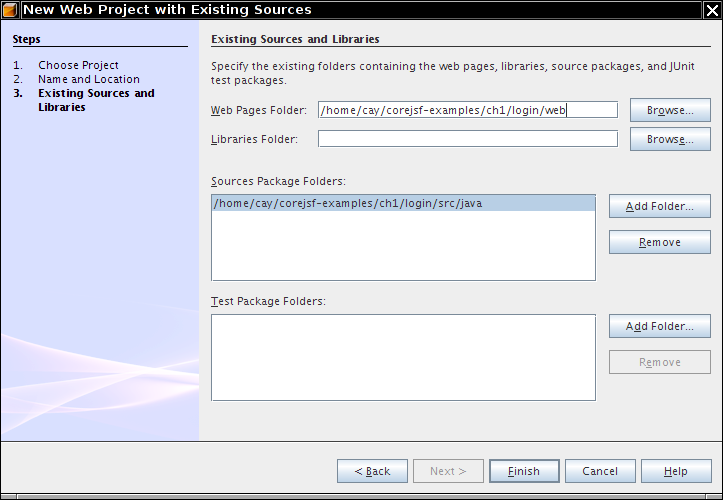
- Select Web and Web Application from Existing Sources
from the wizard.

- Click on the Browse button and select the base directory of one of
the sample programs. (Download the source from http://corejsf.com.) The base directory is
the directory with subdirectories src and web. Do not
select the src directory.

- Click on Next. Review the paths for the web and source
folders. Click Finish.
- The project is now opened. Expand the project node and click on the
files to see their content.

- Select Run -> Run Main Project from the menu, or click the
green triangle button, or use the F6 keyboard shortcut.
NetBeans compiles your code, starts GlassFish, deploys your application,
and launches it in a browser window.