Compiler can't locate include files
There are two ways to get the compiler the files it needs to build your project:- Add the files to the current directory
- Locate the directory containing the CCC header files (typically, c:\ccc\cccfiles)
- From the DOS command line, File manager or Explorer, copy the entire contents to your current directory
- Add the Directory to the Includes list
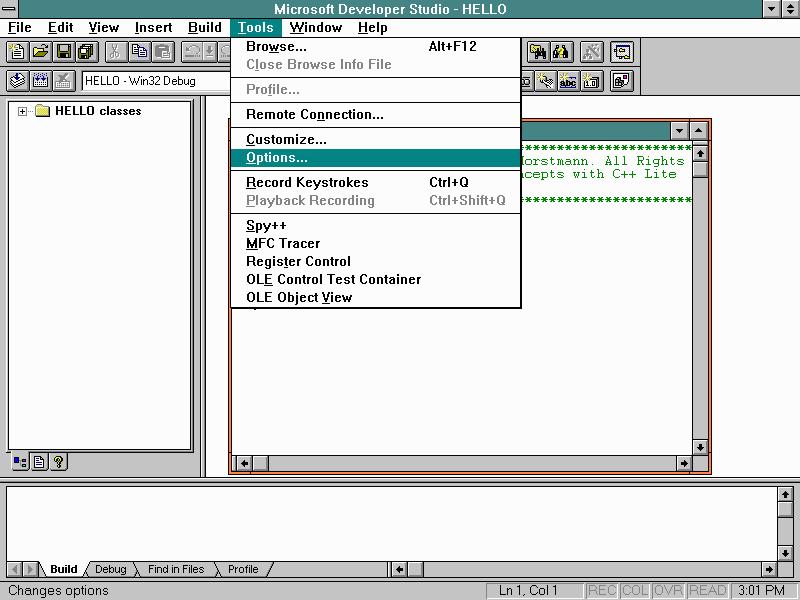
- Select the Tools | Options | Directories from the main menu of MSVC4.0
- Add a line for the complete pathname to the directory containing header files, for example,
c:\ccc\cccfiles
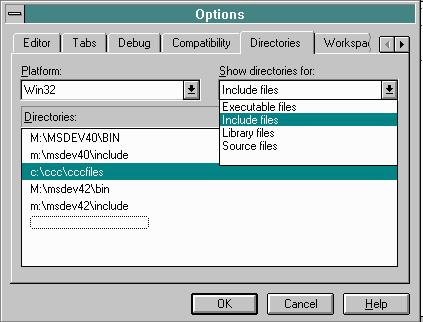
- Select the Tools | Options | Directories from the main menu of MSVC4.0
The Example program shows a blank Black screen
The Default Project Type is Console, it needs to be replaced by a Windows Project
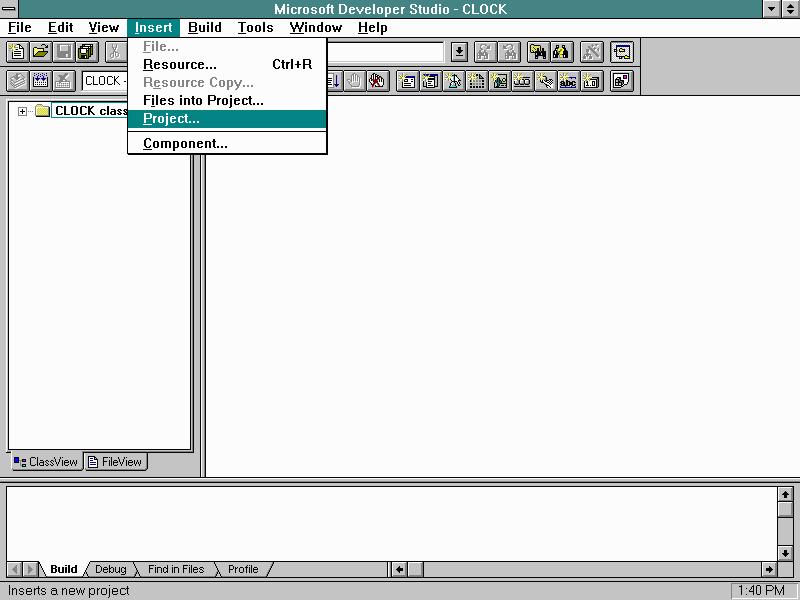
Alternatively, it is also possible insert a new Windows project into an existing default (Console) workspace by:
- From the Main Menu, select Insert | Project Into Workspace
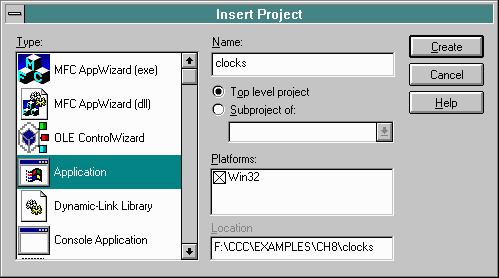
- From the resulting New Project Workspace dialog box
- Under Type: Click on the Application icon
- Under Name: Type your project's name into Edit box
(Name it something other than the base filename of your primary .cpp file) - Under Platform: Select Win32
- Under Location: Browse to select a Directory to contain system
generated files for use as project workspace
(Generally, use the same directory as your primary .cpp source file) - Click on the Create button to confirm type, name, platform and
location of your new project workspace
- Select the Insert | File into Project... option from the main menu
of the Developer Studio

- Browse and select your primary .cpp file to include in the workspace,
e.g. ~\ccc\examples\ch*
