
NetBeans is a free open-source Java environment available from http://netbeans.org. NetBeans is a pure
Java program that runs on all platforms that supports Java 2.
NetBeans requires a Java 2 runtime, so you need to install the Java 2
SDK first before installing NetBeans. You can download the SDK from http://java.sun.com/j2se/.
When you start NetBeans, a startup screen appears, and the program spends some time loading various modules.

When the program has finished loading, you see a screen similar to the following:
As you can see, NetBeans is a complex program with many options for
professional programmers. You can ignore most of the options if you use
NetBeans only to compile and run simple Java programs.
If you already have your program in a Java file (or a directory
containing multiple Java files), then you can simply load your program
file (or, in the case of multiple files, the file containing the main
method) with the File->Open File menu command.
Your program file is now placed in an edit window:

This is the best part about NetBeans. It is really easy to load in programs that you created in some other way, without having to fuss with projects.
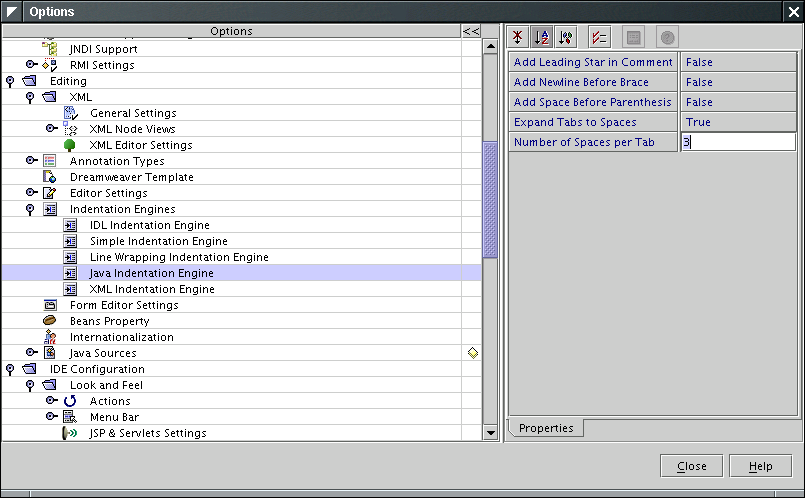
Tip: By default, NetBeans uses 4
spaces per tab stop. To change to 3 spaces per tab stop (which is used
in the textbook), select the Tools->Options menu command. In
the resulting dialog, click on the “doorlatch” next to the Editing
entry. Then click on the Indentation
Engines and Java Indentation Engine entries. To the
right, the Java editor settings appear. Click on the value next to the Number
of Spaces Per Tab entry. Change it to 3 and close the dialog.
If you write a program from scratch, then you can start your work in
NetBeans. It is always best to place each of your programs into a
separate directory. First create the directory outside NetBeans, for
example, with the mkdir command in a command shell. Here is a
typical Windows shell interaction:

On Linux or Mac OS X, you would create the directory inside your how directory:
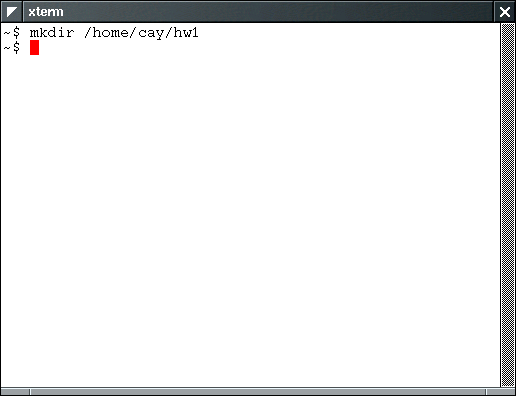
Back in NetBeans, select the menu command File->Mount File System. In the resulting file dialog, select Local Directory.
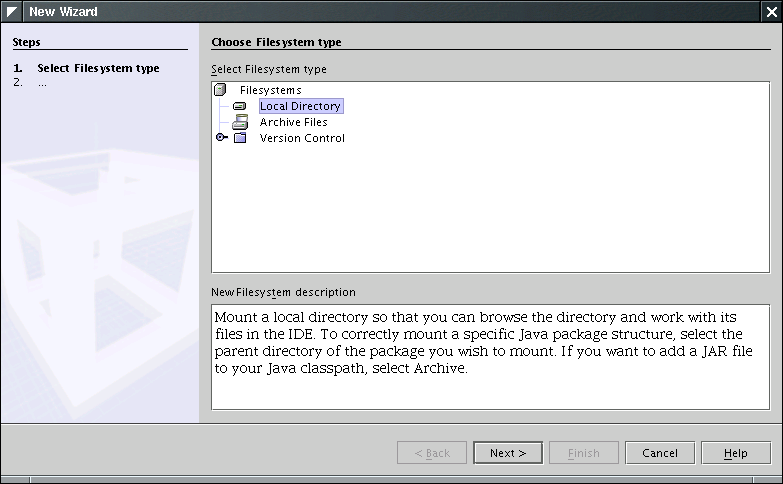
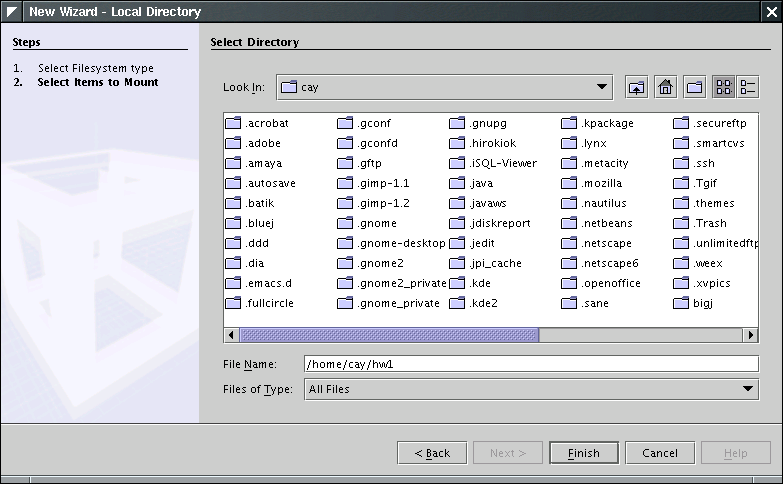
Click on Next. In the next dialog,
type in or select the name of the directory that you just created.
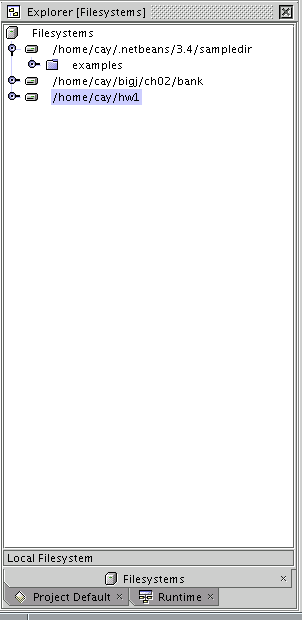
Now locate the Explorer [Filesystems] window on the left hand side of the main NetBeans window. Select the file system that you just added.
Now select File->New from the menu. You get the following dialog.
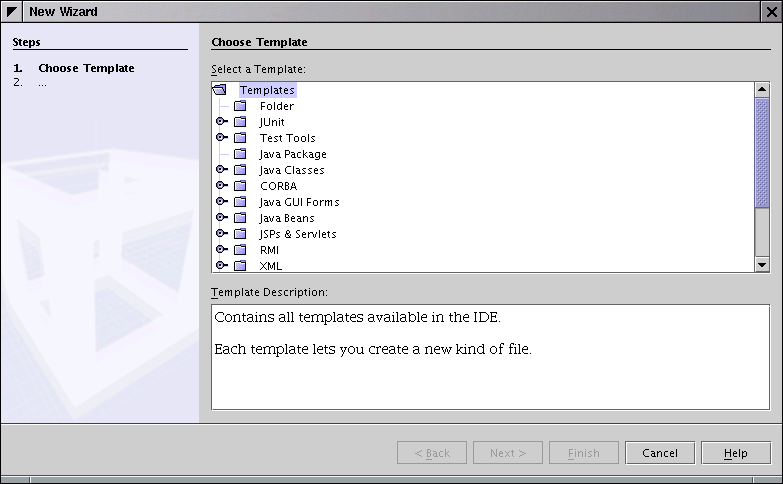
Click on the "door latch" of the "Java Classes" node.
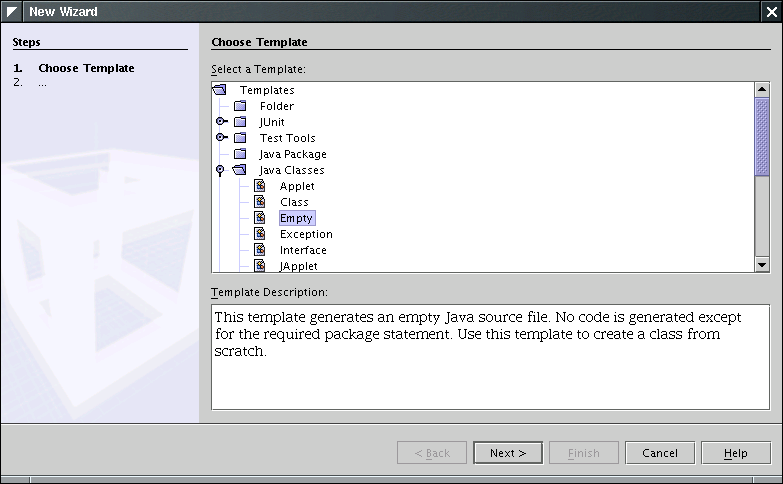
Now select Empty and click on Next>. You get the
following dialog:

Replace the “<default name>” entry in the Name field
with the class name that you want. Select the directory that you created
for your program in the “Filesystems” tree. Click on Finish.
Finally, you get an editor window into which you can type your program.
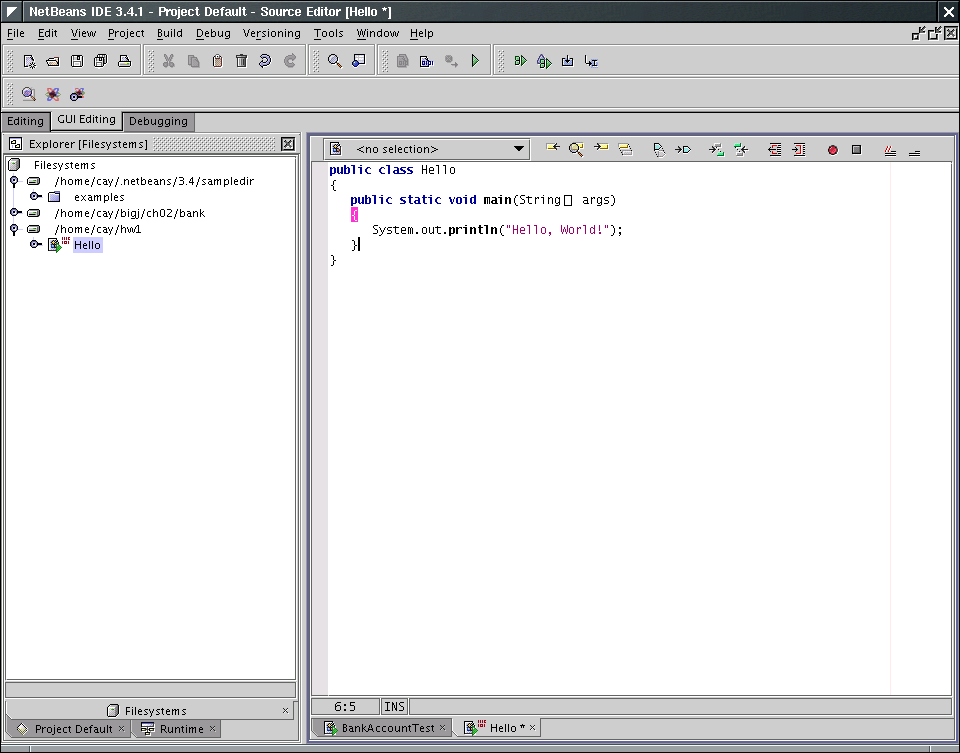
As you type in your program, occasionally select File->Save from the menu to save your work.
To compile a program in NetBeans, select Build->Compile from the menu. Alternatively, you can hit the F9 keyboard shortcut. If the compilation is successful, a message “Finished program name” appears in the Output Window.

If you made a syntax error, the offending lines are underlined in
the edit window, and the output window lists the error messages.

To run a program, select the Build->Execute menu option or hit the F6 keyboard shortcut. The program runs. Any console output is directed to the output window.

Sometimes, the output window contains multiple tabs. Click on the
tab labeled Program Name - I/O
to see your program output.
To run an applet, you must first compile the program as previously
described.
If you supply an HTML file for your applet, you can launch a browser
window from NetBeans to view the applet. Locate the HTML file in the
file system explorer and click on it with the right mouse button. Select View from the menu.
Your browser is launched and displays the HTML file. This method
requires that your browser is set up to display Java 2 applets. By
default, Internet Explorer does not show Java 2 applets. You have two
remedies:
Alternatively, you can view applets in the applet viewer tool.
Unfortunately, the method for launching the applet viewer in NetBeans
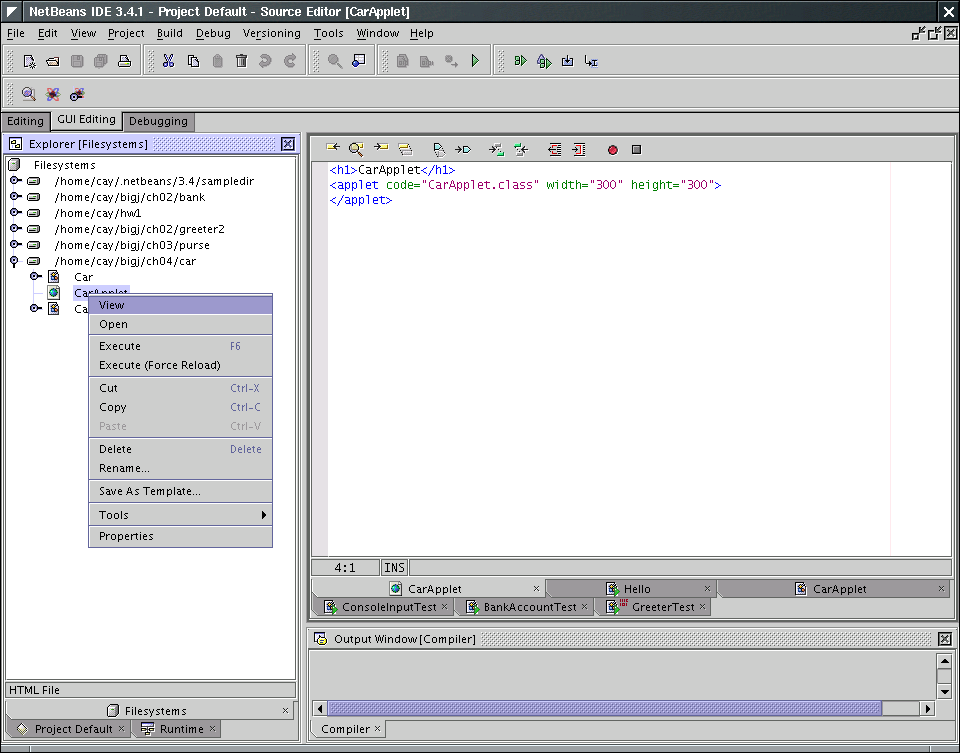
is cumbersome. First, you need to add the HTML applet tags inside the Java source file, inside a comment,
like this:
/*
<applet code="CarApplet.class" width="300" height="300">
</applet>
*/
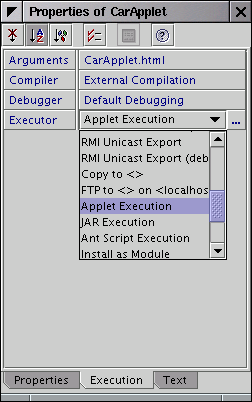
Then position the mouse inside the editor window of the applet file and click with the right mouse button. A property window will pop up:
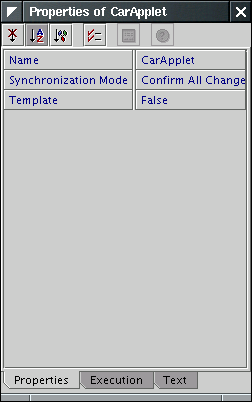
Click on the tab labeled Execution. Then click on the field next to the Executor entry and select Applet Execution from the drop-down list.
Now select the Build->Execute menu option or hit the F6 keyboard shortcut. The applet viewer pops up.
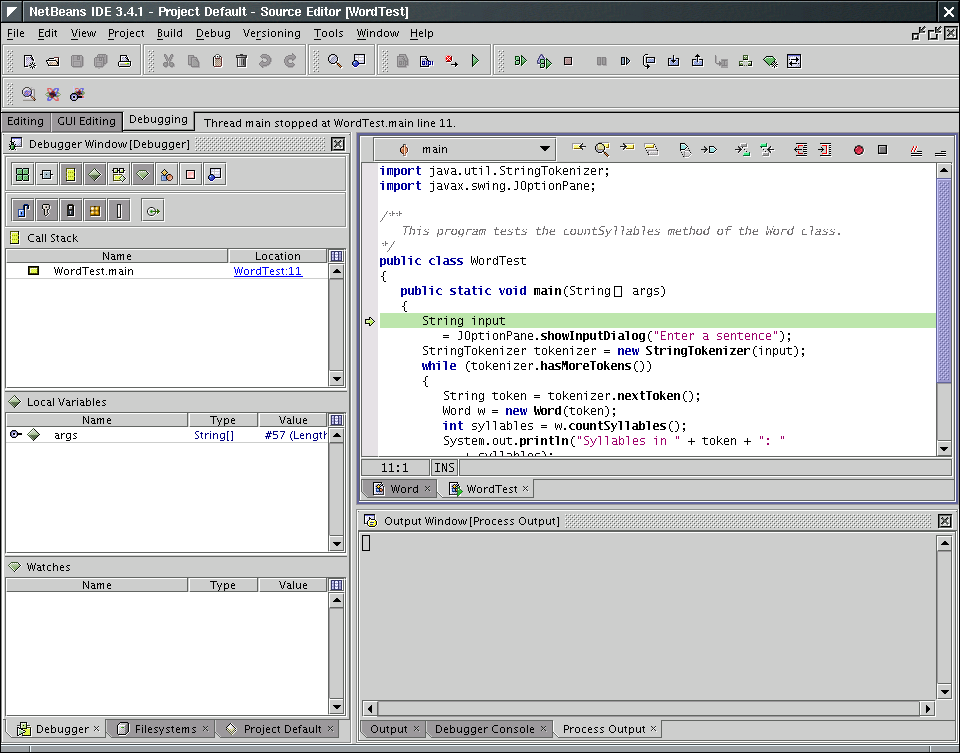
To start tracing through a program, select the menu option Debug->Step Into or hit the F7 keyboard shortcut. If the debugger is not already running, this command starts the debugger and runs the program until the first line of the main method. For example, here is the debugger display when tracing into the WordTest program of Chapter 8.
Whenever you select the menu option Debug->Step Over (or the F8 keyboard shortcut), then the debugger executes one line of the program, without stepping inside method calls. For example, tracing over the call
      String input
         = JOptionPane.showInputDialog("Enter a sentence");
will not trace inside the showInputDialog method but simply run the program to the next line of the main method.
Contrast that with the menu option Debug->Step Into (or the F7 keyboard shortcut). This command traces inside method calls. For example, tracing into the line
Word w = new Word(token);
stops at the first line of the Word constructor:

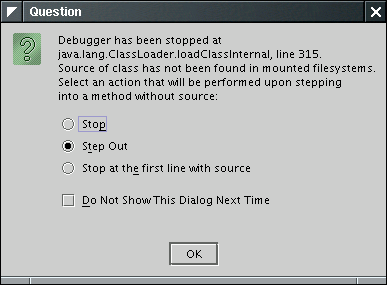
Simply choose the third option (Stop at the first line with source).
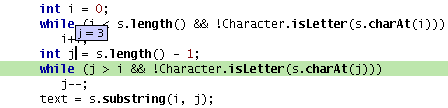
To see the value of a variable of a simple type (such as a number or a string), simply hold the mouse pointer over the variable name when the debugger is stopped. Then the contents of the variable is displayed in a small rectangle next to the variable name. For example, here we inspect the contents of the variable j in the Word constructor.
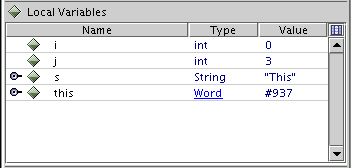
You can see all local variables in the Local Variables window:
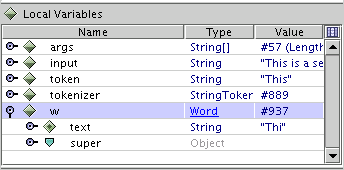
Click on the “door handle” to expand the value to its instance
fields. For example, here we expand the variable w in the main method of the WordTest class:
Tracing through a program can be tedious. Often, you want the program to run at full speed until a particular line of code is encountered. To set a breakpoint at a line, click on the gray margin next to the line, or hit the SHIFT+F8 keyboard shortcut. The line turns pink, indicating that a breakpoint has been set.

Now select the menu option Debug->Continue or hit the CTRL+F5 keyboard shortcut. The program runs to the next breakpoint, stopping only for user input.
You can set as many breakpoints as you like.
To remove a breakpoint, click on it with the mouse with the right mouse button, then select the Toggle Breakpoint menu option, or hit the SHIFT+F8 keyboard shortcut.
When the program has completed, the debugger stops automatically. A message “Debugger finished” appears on the status line.
When you want to terminate a debugging session without running the program to the end, select the menu option Debug->Finish.
Now you probably want to click on the Editing tab of the NetBeans toolbar to get the editing windows back.