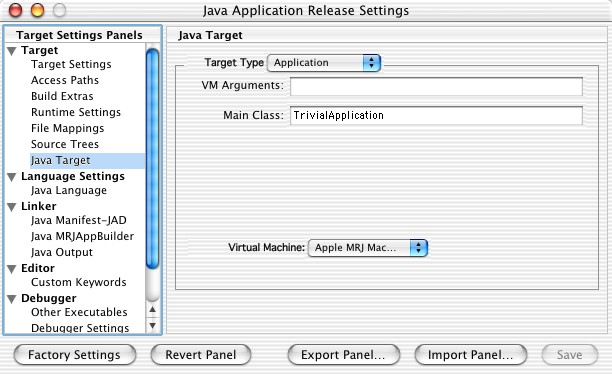
Click on the triangle next to "Generic" so that it points downwards. Select the Java Application option. Click on the Ok button.
CodeWarrior is a commercial Java environment available from http://metrowerks.com. An inexpensive
academic edition is available. CodeWarrior runs on both Windows and Mac
OS.
The screen shots in this document were taken on Mac OS X, but the
Microsoft Windows version of Metrowerks is entirely analogous. Only the
window decorations are different.
When you start CodeWarrior, the environment looks quite bare until
you load projects--see the next section.

If you already have your program in a Java file (or a directory containing multiple Java files), then you need to make a project that contains the file. Follow these steps.
Select File->New from the
menu. You will get the following dialog.

Select the Java 2 SE Stationery
option. (Do not select the Empty
Project option!) Give a name to the project. The best choice
for the name is the name of the directory that contains the files. For
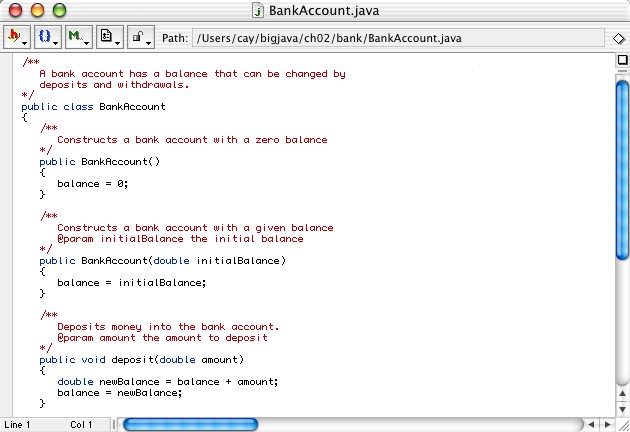
example, if BankAccount.java
and BankAccountTest.java
are located inside a directory bank,
call the project bank.
Edit the Location field so
that it contains the full directory path of your program files, such as c:\bigjava\ch03\bank or /Users/yourname/bigjava/ch03/bank. Click
on the Ok button.
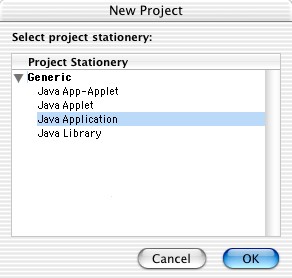
You will get the following dialog:
Click on the triangle next to "Generic" so that it points downwards.
Select the Java Application
option. Click on the Ok button.
Your project is displayed in a new window.
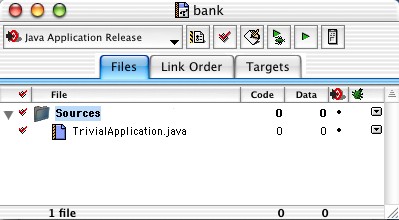
Click on the triangle so that it points downward. Increase the window size if necessary. Highlight the file TrivialApplication.java. Select Edit->Clear from the menu. When asked if you really want to remove the file, confirm.
Next select Project->Add files
from the menu. Locate the files that you want to add.
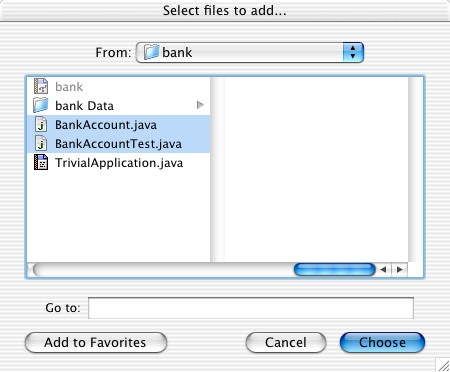
(You can select multiple files in the file dialog with the CTRL+Click/COMMAND+Click
combination, or you can repeat this process multiple times.)
You get the following dialog.
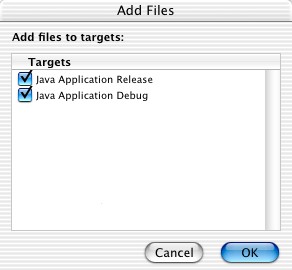
Choose Ok.
The files are added to the project window. Double-click on a file to
bring up an editor window.
If you write a program from scratch, then you can start your work in
CodeWarrior. It is always best to place each of your programs into a
separate directory. CodeWarrior will create the directory for you.

Select the Java 2 SE Stationery
option. (Do not select the Empty
Project option!) Give a name to the project. The best choice
for the name is the name of the directory that contains the files. For
example, if your homework files are contained inside a directory hw1, call the project hw1.
Edit the Location field so
that it contains the full directory path of your program files, such as c:\homework\hw1 or /Users/yourname/homework/hw1.
Click on the Ok button.
You will get the following dialog:
Click on the triangle next to "Generic" so that it points downwards. Select the Java Application option. Click on the Ok button.
Your project is displayed in a new window.
Click on the triangle so that it points downward. Increase the
window size if necessary. Highlight the file TrivialApplication.java. Select Edit->Clear from the menu. When
asked if you really want to remove the file, confirm.
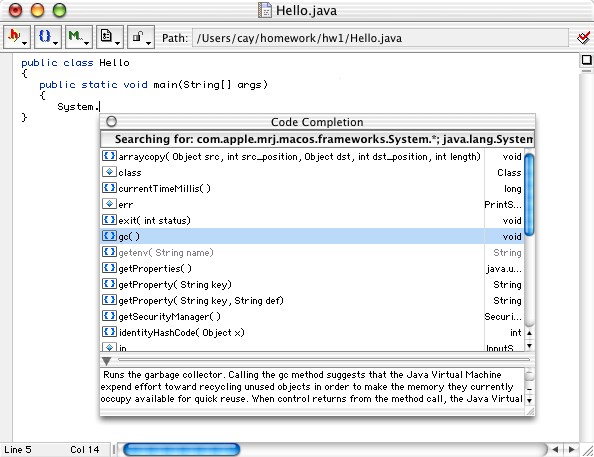
Now select File->New text file
from the menu. You get a blank file.
Select File->Save as from
the menu. Manoeuver to the project directory, and supply the name of
the file (such as Hello.java).
Next select Project->Add files
from the menu. Select the file that you just saved.
You get the following dialog.
Choose Ok.
To compile and run a program in CodeWarrior, select Project->Run
from the menu.
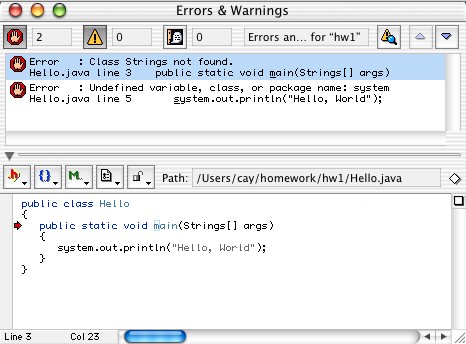
If there are compilation errors, the program will not run. The
errors are displayed in a window. Click on an error message, and the
cursor moves to the offending line in the edit window.
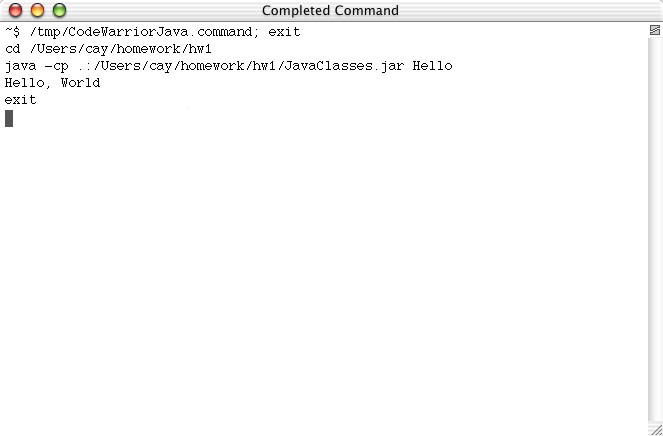
When the program compiles successfully, it is launched in a separate
console window:
To run an applet, you must select Java
applet in the project stationery dialog when you first create the
project. Remove and TrivialApplet.html
and TrivialApplet.java,
and add in the source files and the HTML file of your own project.
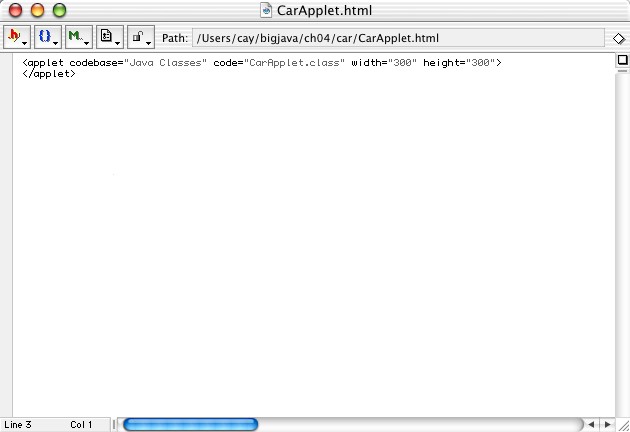
In the HTML file, you need to make a small change to the applet tag due to the way in
which CodeWarrior stores compiled files. Add the entry
codebase="Java Classes"
to the applet tag. For
example,
<applet codebase="Java Classes" code="CarApplet.class" width="300" height="300">
</applet>
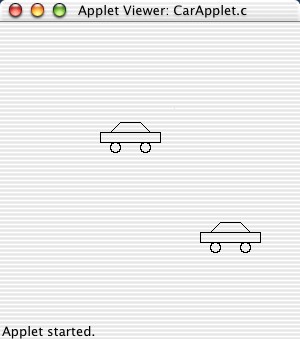
Then select the menu option Project->Run. CodeWarrior will launch the applet viewer.
Select the menu option Project->Debug. The debugger
starts the program and pauses at the first line in main.
Whenever you select the menu option Debug->Step Over (or the CTRL+S keyboard shortcut), then the debugger executes one line of the program, without stepping inside method calls. For example, tracing over the call
Word w = new Word(token);
will not trace inside the Word constructor but simply run the program to the next line of the main method.
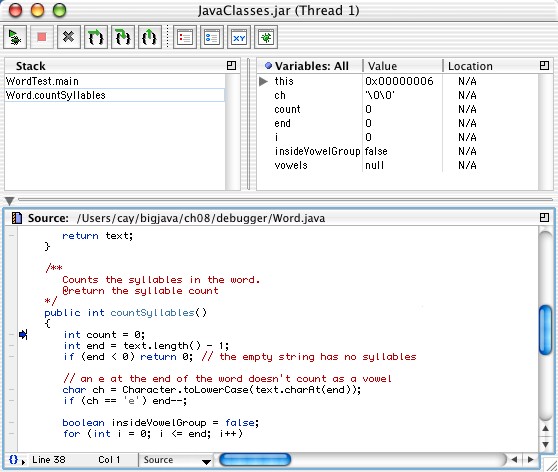
Contrast that with the menu option Debug->Step Into (or the CTRL+T keyboard shortcut). This command traces inside method calls. For example, tracing into the line
int syllables = w.countSyllables();
stops at the first line of the countSyllables method:
If you want to skip over multiple lines, then move the cursor into
the desired line and select Debug->Run
to cursor.
If you aren't sure where the program is going, you can set
breakpoints. To set a breakpoint at a line, click on the bar to
the left of a code line. A red dot indicates the breakpoint.
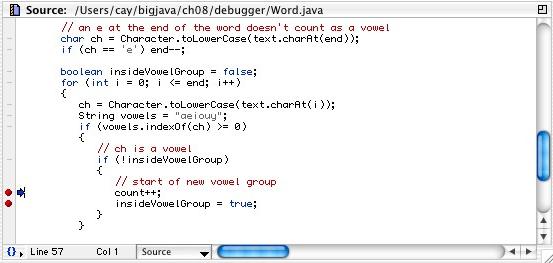
To remove a breakpoint, click on it with the mouse.
When you run the program at full speed, it stops at any breakpoints
that it encounters.
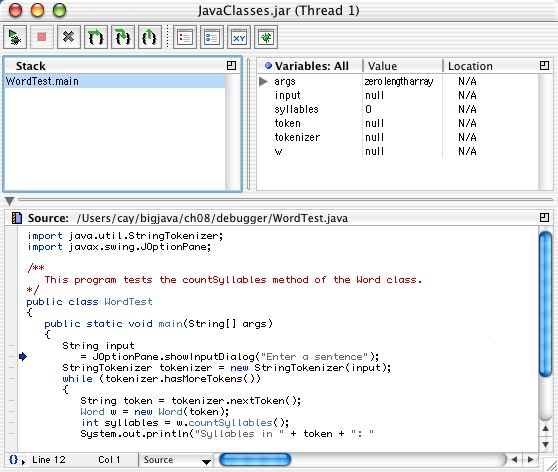
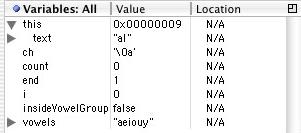
The top right window shows all local variables. Click on the
triangles to look inside objects. To see the instance fields of the
implicit parameter, look inside this.
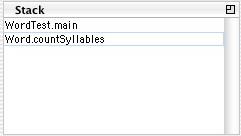
The top left window shows the call stack (with the most recently called method on top). For example, the following call stack shows that the WordTest.main method called the Word.countSyllables method.
When the program has completed, the debugger stops automatically.
When you want to terminate a debugging session without running the
program to the end, select the menu option Debug->Kill.